Cold, gray days do not have to dull your listing. If you are planning to sell in Canton between January and March, smart winter staging can make your home feel brighter, warmer, and more valuable. You want photos that pop online and rooms that feel welcoming at every showing. In this guide, you will learn simple, cost‑effective steps that fit Canton’s winter light and weather patterns so you capture serious buyers. Let’s dive in.
Why winter staging matters in Canton
Canton winters bring short daylight hours, frequent overcast skies, and the chance of snow or ice. That means less natural light for photos and showings, plus exteriors that can look flat without a plan. A warm, well‑lit presentation helps your rooms feel larger and more inviting despite the season.
Winter buyers in January through March are often time‑driven by moves, jobs, or financial timing. They focus on homes that look move‑in ready, well maintained, and comfortable. Small upgrades to lighting, textiles, and curb safety can create an outsized boost in perceived value.
For best results, combine a layered lighting plan, warm colors and textures, a clean and safe entry, and thoughtful photography timing. These choices work with Canton’s winter conditions and help your home stand out online.
Build a warm lighting plan
Choose the right bulbs
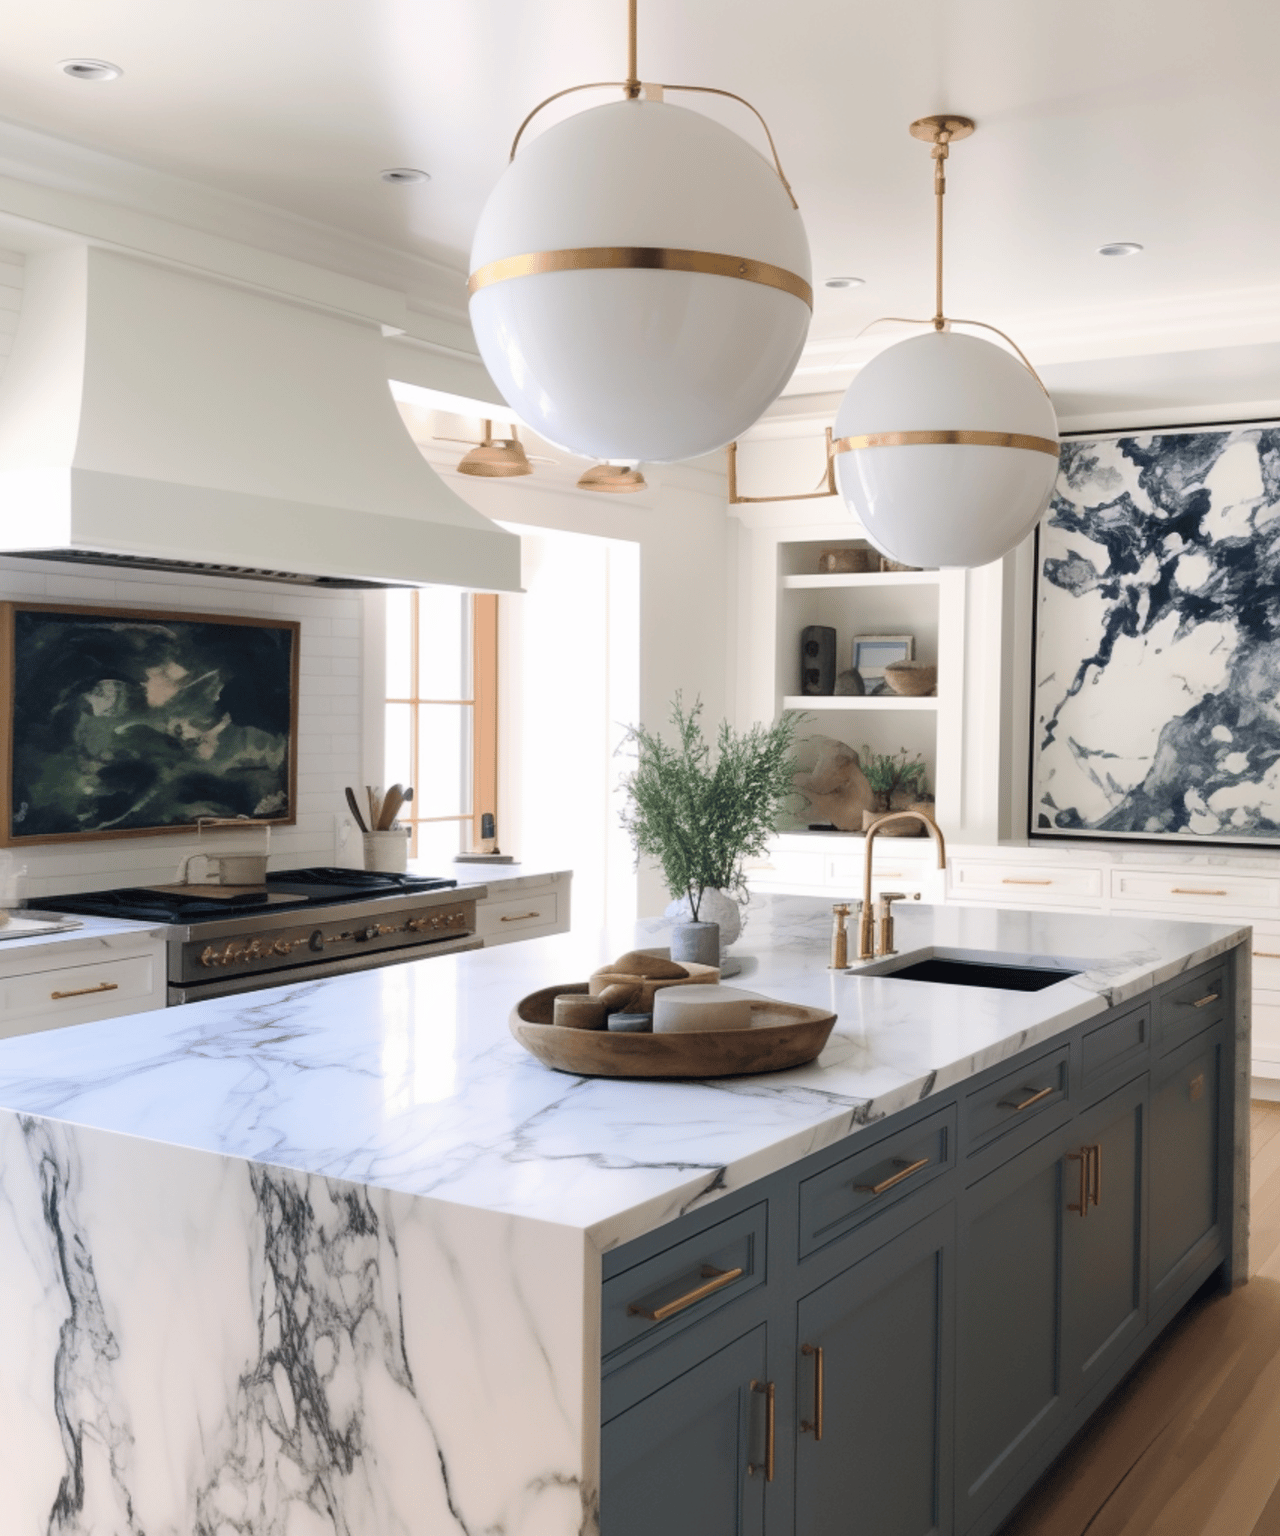
Pick warm white LEDs to create an inviting glow. Use 2700K to 3000K bulbs in living rooms, bedrooms, dining rooms, and entryways. In kitchens, you can go slightly cooler but still warm at 3000K to 3500K for task clarity.
Aim for a high color rendering index. Bulbs rated CRI 90 or higher help paint, floors, and textiles look natural in person and on camera. Balance light levels by room. As a rough guide, target 1500 to 3000 total lumens for living rooms and kitchens and 1000 to 2000 for bedrooms, then fine‑tune with lamps.
LEDs are best for staging. They run cool, last longer, and provide consistent color. Replace mismatched bulbs so every lamp and fixture shows the same warm tone.
Layer ambient, task, and accent light
Use three layers in every key room:
- Ambient: Overhead fixtures or ceiling lights to brighten the full space.
- Task: Under‑cabinet lighting in the kitchen and reading lamps near seating.
- Accent: Lamps or picture lights to highlight art or architectural details.
Turn on every light for photos and showings. Add plug‑in floor or table lamps to dark corners and behind sofas to open shadows. Where possible, install dimmers so your photographer can fine‑tune exposure and you can set a cozy mood for open houses.
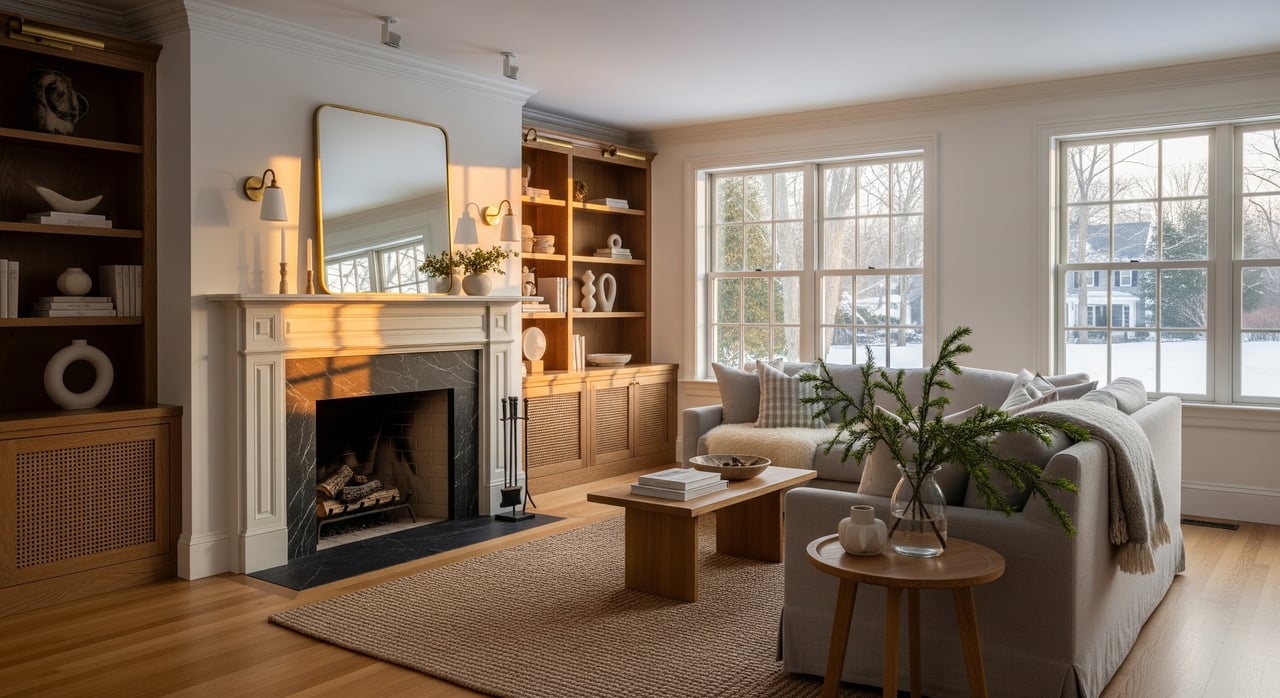
Use fireplaces and candles safely
A lit fireplace reads as warmth on camera and in person. If you use real flames, do so safely and only when you or your agent can monitor the fire. Battery‑operated LED candles offer a consistent, safe alternative and still add a welcoming glow.
Use color and texture to add warmth
Set a warm neutral base
Winter rewards a soft, warm neutral palette. Creams, warm greige, and light taupes keep rooms bright without feeling stark. In accent items, pull in rich tones like terracotta, navy, olive, deep plum, or warm bronze. These add depth without overwhelming the space.
Avoid heavy seasonal themes. Skip holiday‑specific colors or decor that can date your photos or distract buyers. Keep the look clean, calm, and current.
Layer tactile textiles
Texture sells comfort in winter. Bring in wool or chunky knit throws, velvet or bouclé pillows, and layered rugs. Try a natural fiber base rug with a softer area rug on top to create visual depth.
Update bedding with a thicker duvet or quilt in a neutral tone. Add one or two textured throws for a plush look that translates well in photos. At windows, open blinds and sheers for maximum daylight, then use light‑filtering treatments to keep rooms bright while finishing the frame.
Style surfaces with restraint
Less is more in photos. In the kitchen, clear counters and leave one small vignette, such as a wooden board with a bowl of citrus or a small plant. In living rooms, keep the coffee table simple. A tray, two or three books, and a single sculptural object look composed and uncluttered.
Pull furniture a few inches off the walls to improve flow and lighting angles. Create conversational seating that feels lived‑in but neat.
Elevate curb appeal in winter
Keep the entry clean and safe
Clear snow and ice from walkways and steps before photos and every showing. Use sand or safe de‑icing products to prevent slick surfaces. Secure handrails and tighten any loose treads so the entry feels safe and well cared for.
Stage the front door area. Place a clean, low‑profile doormat, remove piles of salt bags and extra shovels from sightlines, and tidy the mailbox and house numbers so they are easy to read.
Add seasonal greenery and lighting
Use hardy, cold‑tolerant planters. Evergreen boxwood, small conifers, or decorative branches with pinecones add life and shape without mess. Elevate pots slightly so wet surfaces do not stain them.
Make sure porch and path lights work and use warm LEDs for a welcoming tone. Solar accents can help between photos and showings, but wired fixtures give the most consistent results.
Small fixes with big impact
Freshen the front door with a quick paint touch‑up or polish the hardware. Update house numbers for legibility. These small visual cues reassure buyers that the home has been maintained.
Nail photo timing and standards
Time your shoot for winter light
Schedule interior photos around midday when natural light is strongest and more even. Overcast days are great because they produce soft, diffused light that avoids harsh shadows. For rooms that face direct sun, shoot when the light is gentler to prevent blown‑out windows.
Plan exterior photos for twilight about 15 to 30 minutes after sunset. Lit interiors combined with warm exterior fixtures create an inviting, high‑contrast look. For daytime exterior shots, aim for clear or partly cloudy skies and avoid fresh slush or dirty snow.
Stay flexible. Winter weather in the Canton area can change quickly. Have a backup photo date in case of a storm or poor conditions.
Prep your home like a pro
Use this pre‑photo checklist so your property is camera‑ready:
- Declutter rooms and remove personal photos and seasonal decor.
- Make beds, fluff pillows, clear counters, and hide cords and bins.
- Open blinds and curtains to maximize light. Remove screens if they darken the view.
- Turn on every interior and exterior light. Set lamps for a consistent warm tone.
- Move vehicles from the driveway for clean exterior shots.
- Set the thermostat to a comfortable temperature for showings.
- Vacuum, wipe smudges from glass and stainless, and tidy rugs.
Avoid common photo pitfalls
- Do not mix cool daylight bulbs with warm bulbs in the same room. Keep color temperatures consistent.
- Do not over‑stage with lots of small accessories. Clutter shrinks rooms on camera.
- Do not shoot exteriors with slush or debris in the frame. Tidy or reschedule.
- Do not forget hallways and stairs. Illuminate them so the whole home feels bright.
Quick staging action plan
Start with high‑impact, low‑cost upgrades, then layer in essentials:
- Replace mismatched bulbs with warm LEDs at 2700K to 3000K and CRI 90 or higher.
- Add two or three lamps to dark rooms, then turn on all lights for photos.
- Declutter counters, remove personal items, and make beds.
- Shovel and de‑ice the main walkway. Place a clean welcome mat.
- Freshen front door paint or polish hardware.
Next, elevate the look with medium‑impact steps:
- Layer rugs and add warm throws or pillows, keeping a neutral base plus one accent color.
- Stage a simple kitchen vignette to hint at lifestyle without clutter.
- Add evergreen containers outside and confirm all exterior lights work.
- Schedule photos for midday interiors and twilight exteriors.
Consider optional investments if needed:
- Rent a small set of modern staging pieces for key rooms if furniture is sparse or very dated.
- Replace a few dated fixtures, focusing on the entry and main living area.
- Book a professional deep clean for carpets, windows, and grout before photography.
What we do for Canton sellers
You deserve a listing plan that meets winter head‑on. Our team pairs local market know‑how with premium presentation so your home looks its best in every condition. We coordinate timing for midday interiors and twilight exteriors, guide you on lighting and textiles, and bring in professional photography that showcases warm, accurate color and balanced exposure.
As a boutique team backed by a respected regional brokerage, we deliver professional marketing, video, printed collateral, and full MLS syndication to reach motivated winter buyers. If you want a clear, step‑by‑step plan tailored to your property in Canton, we are ready to help.
Ready to discuss your winter sale and the best timing for photos and launch? Connect with Mike Reece to get a personalized plan and a current market‑based valuation.
FAQs
What are the best light bulbs for winter staging in Canton?
- Use warm white LED bulbs between 2700K and 3000K with CRI 90 or higher for living spaces; 3000K to 3500K can work in kitchens for task clarity.
How should I time photos for a Canton winter listing?
- Shoot interiors around midday for softer, brighter light and plan twilight exterior photos 15 to 30 minutes after sunset to showcase warm interior and exterior lighting.
What quick curb appeal updates matter most in winter?
- Clear snow and ice, add a clean doormat, check porch and path lights, and consider a simple evergreen planter; touch up the front door and polish hardware.
Which colors and textures make rooms feel warmer?
- Start with warm neutrals like cream or greige, then add tactile layers such as knit throws, velvet or bouclé pillows, and layered rugs for visual warmth.
How can I avoid clutter in listing photos without the home feeling empty?
- Keep surfaces minimal and intentional by using one or two styled vignettes per room and removing personal items, cords, and excess accessories.
Should I light the fireplace for photos and showings?
- Yes, if safe and supervised; a real flame adds warmth. Battery‑operated LED candles are a safe, consistent substitute that still reads inviting on camera.